

Setting up an eCommerce store using WooCommerce: Everything You Need to Know to Start an Online Business
Woocommerce is a subject that keeps coming up with users. This is because building an eCommerce site with Woocommerce seems like a daunting task for businesses wishing to sell online. However, like many other complex tasks, understanding how the process works and going over it a few times does make it so much easier. This blog post is dedicated to Woocommerce, and we’ll be telling you how to set up your store and start selling products.
Let’s get started!
How to build and set up an online store?
In this blog, we’ll be going through the whole process from setting up our WooCommerce account to building and launching our store.
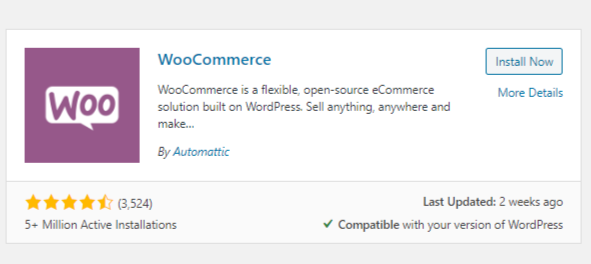
1. Download WooCoomerce plugin
First of all, Download, and install the Woocoomere plugin just as we install any other plugin of WordPress.
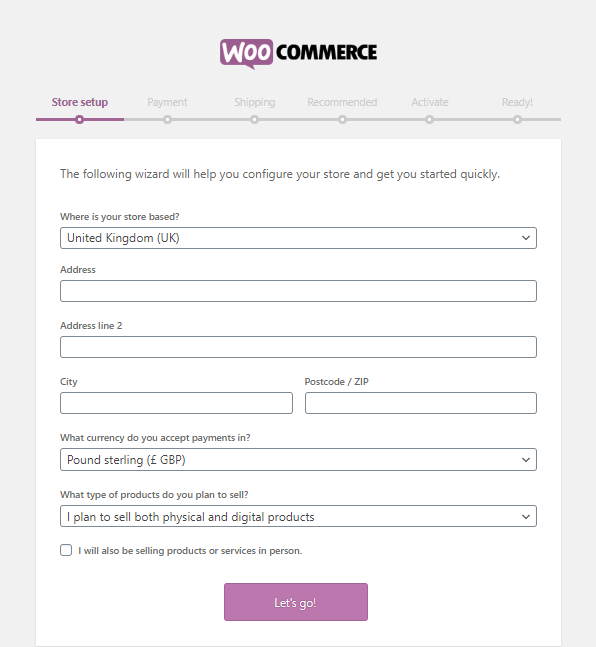
2. WooCommerce Setup Wizard
Once we’ve installed the WooCommerce plugin, we get the WooCommerce Setup Wizard. The UX is wonderfully welcoming and intuitive, making this part of the process easy and straightforward. On the first page, we will register and set up our store by entering our physical address and contact details. You also define the type of store and type of products you want to sell.
After we have reviewed the Terms and Conditions, we will click the Let’s GO button.
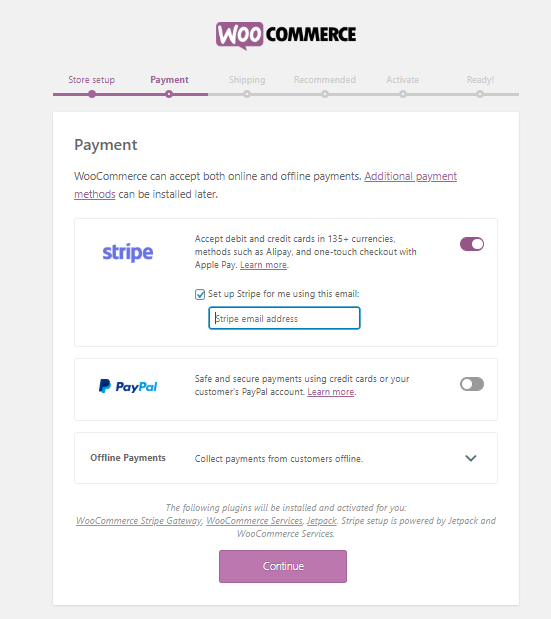
3. Payment
Here, we link up our payment method, so that all the money we make, goes into our designated accounts. Additional payment gateways can be added with the help of the extensions and plugins available through third parties. Coupons and additional discounts can also be added here. Click Continue.
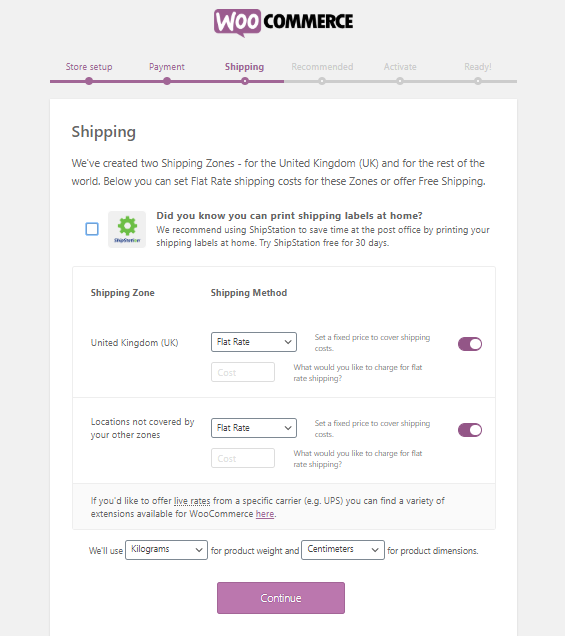
4. Shipping
Here we configure all the details related to our shipping. You can set flat rates, enable free shipping, choose from amongst various shipping methods, add international options for shipping, control the settings for local delivery and pickup.
We also define the size and weight of our products, which is essential while we are shipping our products.
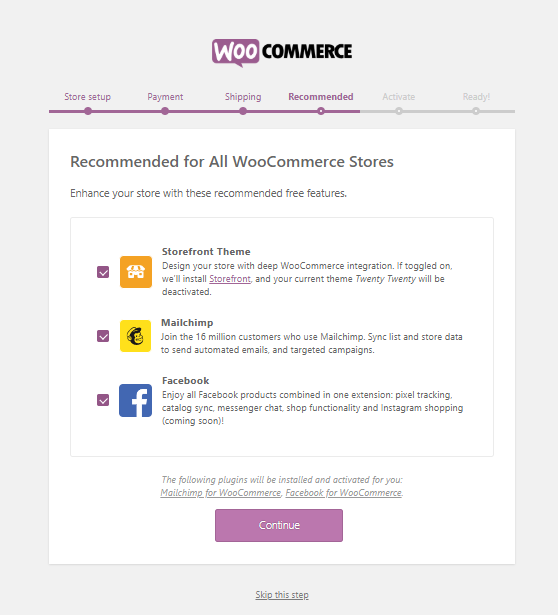
5. Extras section for recommendations
In this section, you can see the theme that you installed during the setup is compatible with WooCommerce. You can also be recommended for some extra extensions.
6. Accounts and taxation
WooCommerce cannot advise you on the kind of taxes for your business — that’s your accountant’s task after all! — you can configure to automate or calculate the tax manually, in accordance with the new rules and guidelines.

7. Adding Products
The setup is done, and now we can create your products using the create products tab. It will be much better if we go back to the WordPress DashBoard and do it from there.
So back on the WordPress Dashboard, we can check to see that all our details are in order.
Once the products have been created, we want the user to be redirected to the checkout or cart page as soon as they have clicked on the items they intend to buy. To do this, we go to the WooCommerce tab and select Settings. Then select the Products Tab. Under add to Cart Behavior, we’ll mark or check the option to redirect to Cart Page.
Having finished setting up WooCommerce on our WordPress Dashboard, the next thing to do is to add and define the products. For doing this, on the WordPress Dashboard, we’ll go just below the WooCommerce tab and click Products. Select Add New.
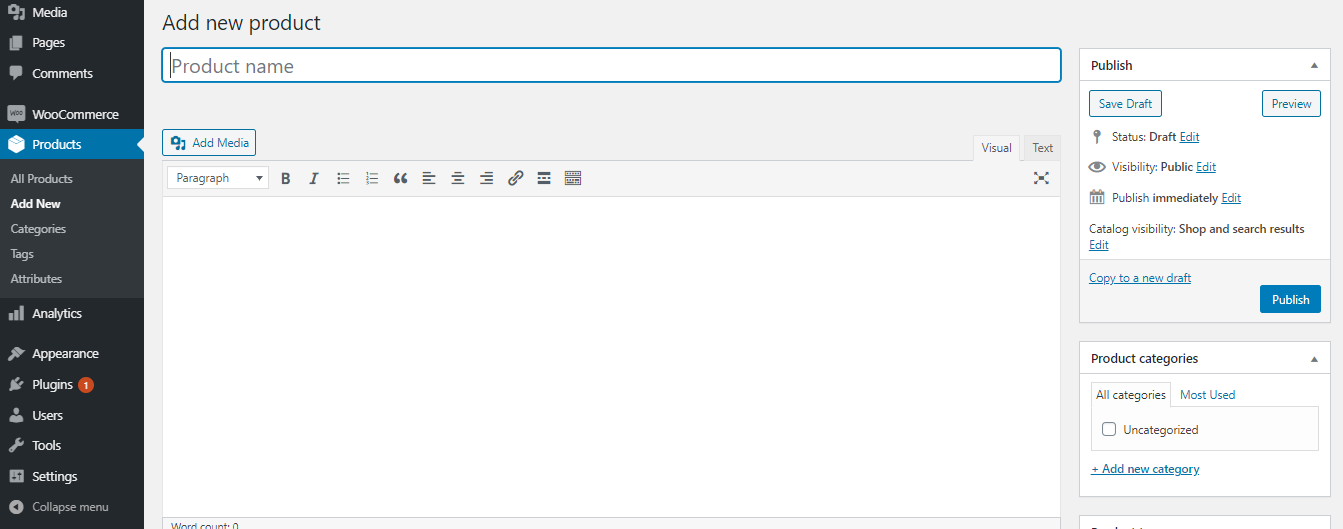
8. Add Product Description
In the Product Info page, we can add a Product name. Here we can make the default Permalink to the product appear more professional. Click Change Permalink, and in the WordPress Permalink Settings, we’ll select the custom structure and create that structure by typing /%Productname%/. Then click Save. This simple phrase tells WordPress to use the name of the product in the Permalink. Now we’ll return to the Product Page and Refresh it. We’ll see that our Permalink slug line looks a lot more professional. If this seems a bit too complicated for you, you can always add a slugline field to this product form, and whatever you write in this slugline box will appear in the address.
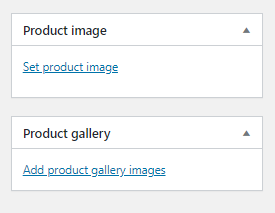
9. Add Product Images
Next, we will add some images of the product. We can also select some photos by clicking on Add Media. Select a photo and click Insert. We add some text about the photo, select it, and use the formatting options to align it nicely. Make the description look more like a heading and on to the product data.
If your product is a downloadable item such as a book, you have the option to set the number of times your book can be downloaded, the schedule for downloading, and the time limit or expiry date for downloading the softcopy of your product.
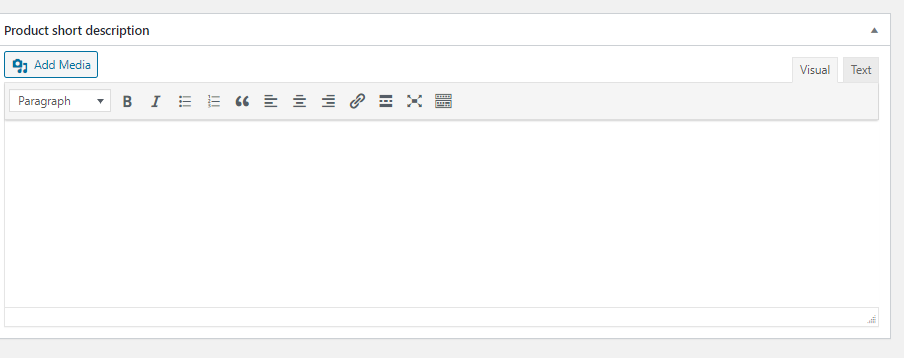
You can also add a short description of the product in the editor box. This description will appear in the top half of the page alongside the image of the product.
10. Generating Performance Reports
You will want to see how much business your store has generated for you through its sales. Go to WooCommerce > Reports Menu, and you can see the following reports:
- Monthwise report of sales
- Daily sales
- Sales of individual products
- Sales of a particular category of products
- Topsellers and earners of your products
- Low stacked and out of stock products
- Reports on discount coupons
These reports serve an instrumental purpose in monitoring the performance of our online business. You can streamline your business by knowing which products are the most demanded, as well as the products that are of no value. Such reports data furnished by Woocommerce itself empowers you to make sound and profitable decisions for your store.
Summing up…
We hope that our blog proved helpful in learning about the tools and functions of WooCommerce. There are plenty of eCommerce solutions offered by WordPress, but WooCommerce seems to be the best as it offers more functionality than most of the premium plugins and, of course–it’s free.
We will be happy to lend you a helping hand in augmenting your knowledge and scaling new heights with your WooCommerce online store. Please reach out to us with your questions and feedback and we will be happy to.